Roof Maintenance: 11 Tasks for a Seasonal Service Visit
Roof maintenance means clearing gutters and debris, checking flashing, pipe boots and attic ventilation, and handling moss gently, once or twice a year. Here are 11 tasks a roofer can turn into a seasonal visit.
Josh · Nov 18, 2026 · 12 min read
- roof maintenance
- roof maintenance checklist
- seasonal roof maintenance
- roofing maintenance plan
- roofing business
Roof maintenance is the routine care that keeps a roof shedding water: clearing gutters and debris, checking flashing and pipe boots, keeping attic vents open, and dealing with moss before it lifts shingles. For most homes it happens once or twice a year, with an extra look after a major storm. The 11 tasks below follow the order a roofer would work through them on a seasonal visit, from the ground to the attic. Use them as your crew's checklist, or as the scope you write into a maintenance plan you sell to homeowners.
How often to schedule a maintenance visit
Once a year is a sensible default for most houses. Roofing Specialists NW, a Seattle-area contractor, puts that visit in late summer or early fall, before the wet season. They suggest twice a year for roofs under heavy tree cover, roofs with complex shapes, flat and low-slope roofs, and roofs past the middle of their expected life. Any roof is worth a look after a significant windstorm.
Owens Corning frames its own homeowner checklist the same way, as a set of annual and semiannual tasks for asphalt shingle roofs. Most of them are quick. The value of a scheduled visit is that the small failures, such as a split pipe boot or a clogged valley, get caught before they reach the drywall.
If you sell maintenance as a plan, the schedule is the product. A fall visit for leaves and winter prep, a spring visit for storm and ice damage, and a call after big wind events covers most climates.

Safety before anyone climbs
Plan each visit so the crew spends as little time on the roof surface as possible. Owens Corning notes that foot traffic scuffs off the granules that protect shingles from UV, and that a boot can catch a shingle edge and lift or crack it. Do what you can from the ground, a ladder or an upstairs window first.
When someone does go up, OSHA's construction fall protection rule (29 CFR 1926.501) requires protection for a worker on a surface with an unprotected side or edge 6 feet or more above a lower level. Its ladder rule (1926.1053) says a portable ladder used to reach an upper landing must extend at least 3 feet above it. Owens Corning also lists wet conditions, high winds, extreme heat and steep slopes as signs a ladder may not be safe that day.
1. Start with a ground walk
Walk the whole house before setting a ladder. Owens Corning recommends binoculars for eaves and overhangs, enough daylight to see clearly, and a flashlight for shaded spots. Step back now and then to see the full roof plane, because sagging and uneven areas show up better from a distance than from the eave.
Look for missing, lifted or creased shingles, displaced ridge caps, dark streaks, and debris piled in valleys. Check the yard and flower beds for pieces of shingle or metal after a windstorm.
Take dated photos of anything unusual from the same spots each visit. A homeowner will not remember whether a valley looked like that last spring, but a photo set will. The comparison also makes your findings easier to trust, because the customer can see the change for themselves rather than taking your word for it.
The ground walk also tells you where you need the ladder and where you do not. On a simple ranch roof, half the checklist may be done before anyone leaves the ground.
2. Clear the gutters and downspouts
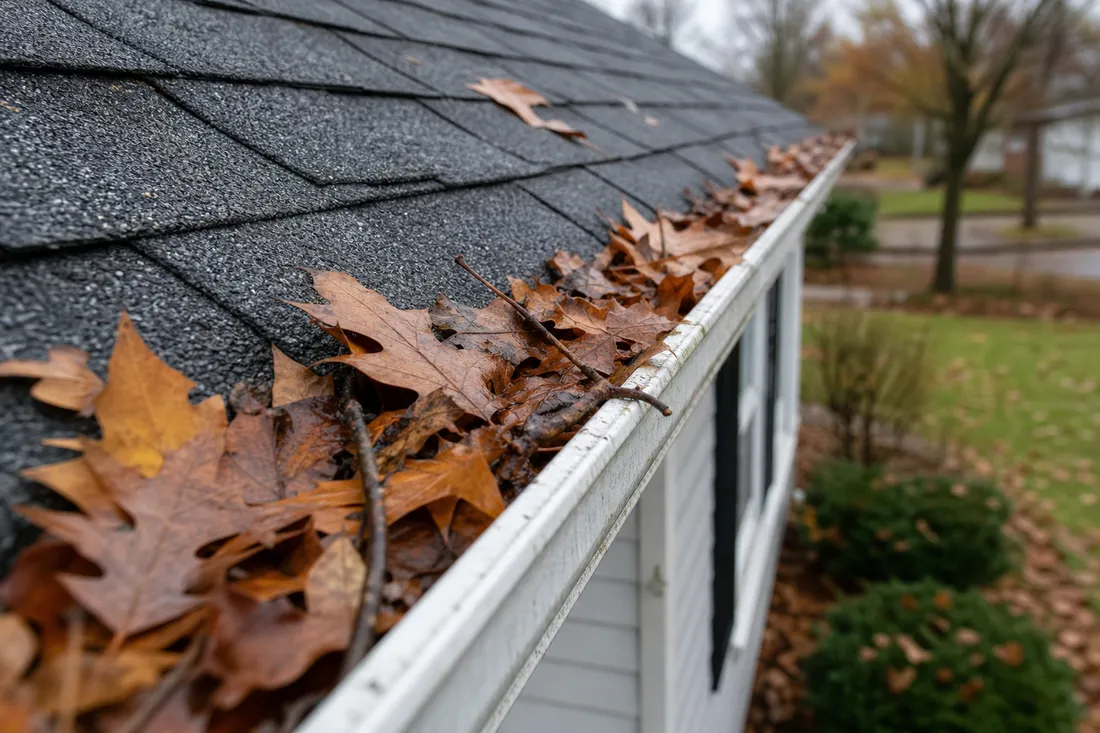
Gutters carry runoff away from the foundation. When they clog, Owens Corning warns, water can back up under the shingles and spill onto siding or brick. Scoop out leaves and grit, flush each run, and confirm water leaves every downspout freely.
Check that the gutters are securely attached while you are there. Loose hangers and sagging sections hold standing water and pull away from the fascia over time.
Pay extra attention where a gutter meets a wall at a right angle. Owens Corning flags those corners as vulnerable, and suggests kick-out flashing or splash guards where water keeps overshooting.
Bag the debris and leave the beds clean. On a maintenance visit, the homeowner judges the work partly by what the yard looks like when you drive away.
3. Remove debris from the roof field and valleys
Leaves, seed pods and needles hold water against shingles for long stretches. Owens Corning recommends removing organic debris at least twice a year, more often where trees drop a lot of material, and notes that rainwater washes loose debris down into the gutters.
Valleys collect the most because two slopes funnel into them. Roofing Specialists NW points to clogged valleys as one of the small problems a scheduled visit catches early. Standing water and trapped debris shorten roof life, in their experience, faster than almost anything else in a wet climate.
Use a light, flexible broom or a leaf blower, depending on access. Owens Corning cautions against any tool that rubs the shingle surface, because it can knock granules loose. A stiff push broom or a flat shovel scraped across the field does exactly that.
On low-slope sections, clear drains and scuppers too, and confirm water can actually leave the roof.
4. Trim back branches touching the roof
Branches that brush the roof wear it down. Owens Corning compares the effect to foot traffic: limbs rub granules off shingles, especially during windstorms. Their guidance is to cut back far enough that branches do not touch the roof or gutters even on the windiest days.
Overhanging trees also drop the debris from task 3 and keep the roof shaded and damp, which helps moss and algae grow.
Small limbs you can reach safely from the roof edge are part of the visit. Large limbs over the house are a job for a tree service, and many roofers prefer to refer them out. Either way, write down which trees need work and photograph them, so the homeowner has a clear list.
If a branch has already scraped a patch of shingles bare, record the spot. Bare shingles age faster in the sun, and that area belongs on the monitor list for the next visit.
5. Treat moss and algae gently
Moss and algae thrive on north-facing slopes, under shade trees and in wet climates, according to Owens Corning. Moss soaks up water, and large clumps can raise shingle edges and expose the undersides. Algae mostly leaves dark streaks, but it also holds moisture.
Owens Corning's current cleaning guidance is a gentle wash: water at low pressure from a garden hose or a low-pressure sprayer. It advises against pressure washers, which can displace granules and may void manufacturer warranties, and against stiff brushes and abrasive tools.
Cover plants below with plastic sheeting or tarps, and rinse thoroughly, because runoff can affect soil and vegetation. Read the shingle manufacturer's own care instructions before you use any cleaning product.
Moss removal done badly damages roofing, Roofing Specialists NW warns, so price it as its own line item. Where growth keeps coming back, recommend regular treatment and trimming the trees that shade the roof.
6. Check the flashing
Flashing seals the places where the roof meets something else: chimneys, walls, skylights, dormers and valleys where two slopes join. Owens Corning lists the warning signs as rust, dents, missing fasteners and sealant that is breaking down.
Roofing Specialists NW checks flashing at chimneys, walls and skylights, and at roof-to-roof intersections, for metal that is lifted, corroded or installed in the wrong sequence. That last one matters on a house you did not roof yourself. Flashing lapped the wrong way can look fine and still channel water behind the siding.
Walk each transition slowly and look at the sealant beads up close. Re-seal small gaps on the visit if that is in the plan's scope. Note anything bigger, such as rusted step flashing or a chimney that needs counterflashing, as a separate repair with its own price.
Photograph each chimney and wall junction from the same angle every visit, so a slow change shows up in the report.
7. Inspect pipe boots and other penetrations
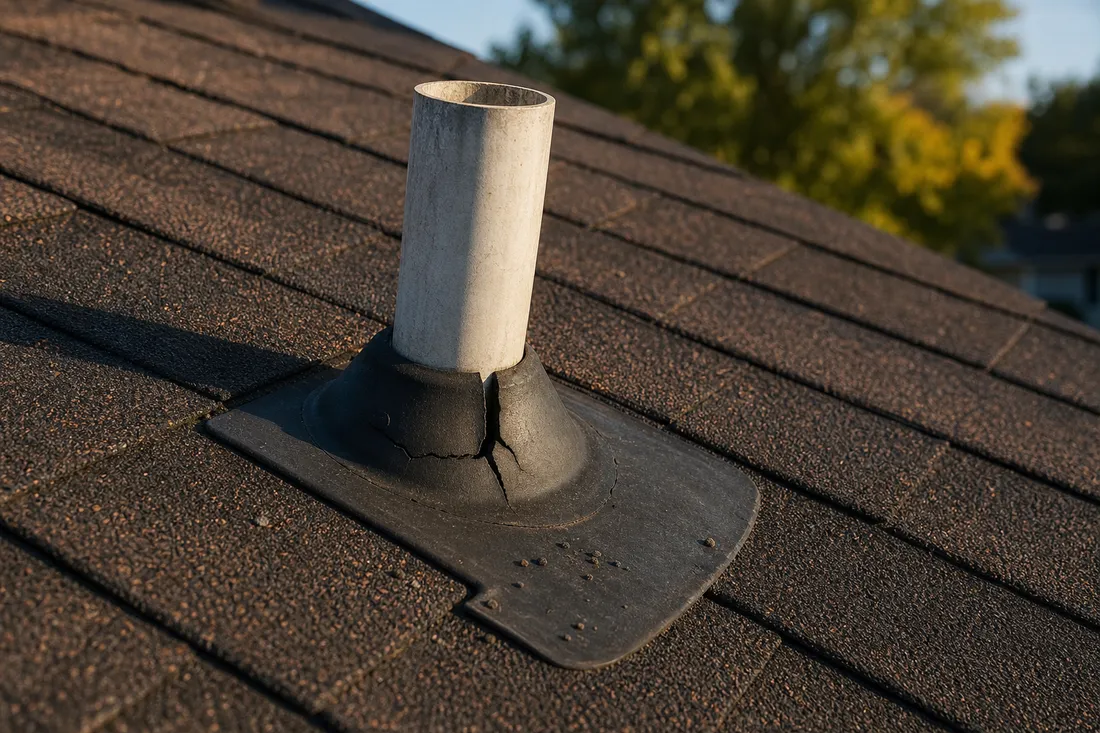
Plumbing vents, exhaust fans and other penetrations are sealed with rubber gaskets, metal collars or sealant. Owens Corning notes that the gasket and the sealant around it can dry out and fall apart over time. Roofing Specialists NW looks for splitting and UV damage on vent collars and pipe boots.
A failed boot is a classic slow leak. Roofing Specialists NW describes one splitting in July and going unnoticed until a ceiling stain appears in November. By then the water has been in the sheathing and insulation for months.
Check every penetration, including the ones on the back slope that the homeowner never sees. Count them and list them in the report, so the next visit covers the same set.
Replacing a split boot is usually quick, but it is still a repair. Quote it on the spot if your plan allows, or list it as urgent so it is done before the next heavy rain.
8. Look in the attic
The attic shows what the roof surface hides. Owens Corning lists stains on insulation or framing, signs of moisture and musty odors as clues to a leak or a ventilation problem. Roofing Specialists NW looks for condensation, too little intake and blocked ventilation, all of which shorten a roof's life from below.
Go up with a good flashlight, and look along the underside of the deck near every penetration, valley and chimney. Fresh stains, rusty nail tips and damp insulation are worth photographing.
Check that airflow is not blocked. Owens Corning names insulation, stored boxes and insect nests as the usual culprits, including along the path up to the exhaust vents. Rafter vents keep insulation from packing against the soffits.
Only enter attics where the floor or joists give safe footing. A foot through the ceiling turns a maintenance visit into a drywall job.
9. Confirm the vents are open and venting outside
A balanced ventilation system lets warm, moist air leave through exhaust vents near the ridge while cooler, drier air enters through intake vents at the soffits. Owens Corning ties that airflow to fewer problems with mold, mildew and ice dams.
From outside, check that soffit screens are clear of debris and paint. Owners and painters often paint over them without noticing.
Then check where the house's moist air goes. Owens Corning says new construction codes require dryer and bathroom exhaust to vent outdoors, and warns that some older homes vent fans into the attic or crawlspace instead. That warm, humid air feeds mold. While you are in the attic, follow each bath fan duct to its termination. Check that dryer hoses and ducts are crack-free and securely attached.
A fan that dumps into the attic is an easy finding to explain and an easy fix to quote.
10. Follow the water path
Water should leave the roof in the gutters and leave the house through the downspouts. Two places are easy to miss.
The first is an upper downspout that empties onto a lower roof. Owens Corning advises that downspouts running from one level to another cover the entire span and connect to the lower gutter. Otherwise, runoff hits the same strip of shingles every storm, knocking granules loose and encouraging algae.
The second is the wall below. After heavy rain, Owens Corning suggests checking the exterior for areas that stay wet or show streaks, which can point to gutter or soffit problems. Look at window sills and casings for warping or missing caulk at the same time.
Make sure all discharge flows away from the foundation. A downspout extension or splash block is a small add-on that solves a real problem.
11. Prepare for ice dams in cold climates
Ice dams form when snow on the roof melts, from sun or heat leaking through the deck, and refreezes at the colder eaves. Owens Corning explains that the meltwater then pools behind the ice, where it can degrade shingles and leak into the deck.
The cause is usually in the attic, not on the roof. Owens Corning's guidance is to have a professional check for balanced ventilation and adequate insulation, which limit how much heat reaches the deck. That makes the fall visit the right time, after tasks 8 and 9.
Look for evidence of past dams: water stains on the eave soffits, damaged gutters, and staining on the attic deck near the walls. If you find them, recommend the ventilation and insulation fixes now.
Where a roof will be replaced in the next few years, note that an ice and water barrier at the eaves belongs in the replacement scope.
Write up what you found
The report is what the homeowner keeps, and it is where repair work comes from. Roofing Specialists NW sorts findings into urgent repairs, planned maintenance and items to monitor. They deliver them in writing with photos and a defined scope, not as one long urgent list.
ROOF MAINTENANCE VISIT
Address: [address]        Date: [date]        Technician: [name]
Roof type: [asphalt shingle / low-slope / other]   Approx. age: [years]
Weather on visit: [conditions]

COMPLETED TODAY
[ ] Ground walk and photos      [ ] Gutters and downspouts cleared
[ ] Field and valleys cleared   [ ] Small limbs trimmed
[ ] Gentle wash (if in scope)   [ ] Attic checked

URGENT REPAIR (before next heavy rain)
1. [finding] - photo [#] - price $[ ]

PLANNED MAINTENANCE (next 6 to 12 months)
1. [finding] - photo [#] - price $[ ]

MONITOR (check again next visit)
1. [finding] - photo [#]

Next visit: [season and month]
Keep a copy for each address. Over a few visits, the reports show which roofs are aging fast and when a replacement conversation is due.
Frequently asked questions
How often should a roof get maintenance?
Once a year for most homes, and twice a year for some. Roofing Specialists NW recommends a second visit for roofs under heavy trees, complex roofs, low-slope roofs and older roofs. Any roof deserves a check after a significant windstorm.
Can you pressure wash an asphalt shingle roof?
No. Owens Corning advises against pressure washers because they can displace granules and may void manufacturer warranties. Wash at low pressure instead, and protect the plants below.
Is roof maintenance the same as a roof inspection?
No, though they overlap. An inspection records condition, while maintenance also does the work: clearing gutters and valleys, trimming limbs and sealing small gaps. A maintenance visit usually includes an inspection, and its report should separate the two. For the inspection side, see this roof inspection checklist.
Does every maintenance visit require walking the roof?
No. Owens Corning recommends limiting roof walks because foot traffic scuffs granules. Do the ground walk and ladder checks first, and go on the roof only where something needs a closer look or hands-on work.
Make maintenance visits easy to book
A seasonal plan only works if homeowners can find you and ask for the visit. A roofing site should list the services you offer, where you work, and a simple way to request a time.
Kejoola gives a roofing business a four-page website (Home, Services, Blog and Contact) with online booking. The booking form collects name, email, phone and a notes box, where a homeowner can mention the roof's age, the trees over the house, or the leak stain they just noticed. For what else that site should cover, see what a roofing website needs. To price the repairs a visit turns up, use this roofing estimate template.