Electrical Inspection Checklist: 8 Templates for Electricians
An electrical inspection checklist lists every part of a wiring system you check, in a fixed order, with a place to record findings. Eight copy-ready templates for electricians: client interview, service and meter, main panel, branch wiring, room-by-room devices, GFCI and AFCI tests, a small commercial space, and a ranked findings report.
Josh · Nov 16, 2026 · 15 min read
- electrical inspection checklist
- electrical safety inspection
- electrical panel inspection
- home electrical inspection
- GFCI testing
- electrician forms
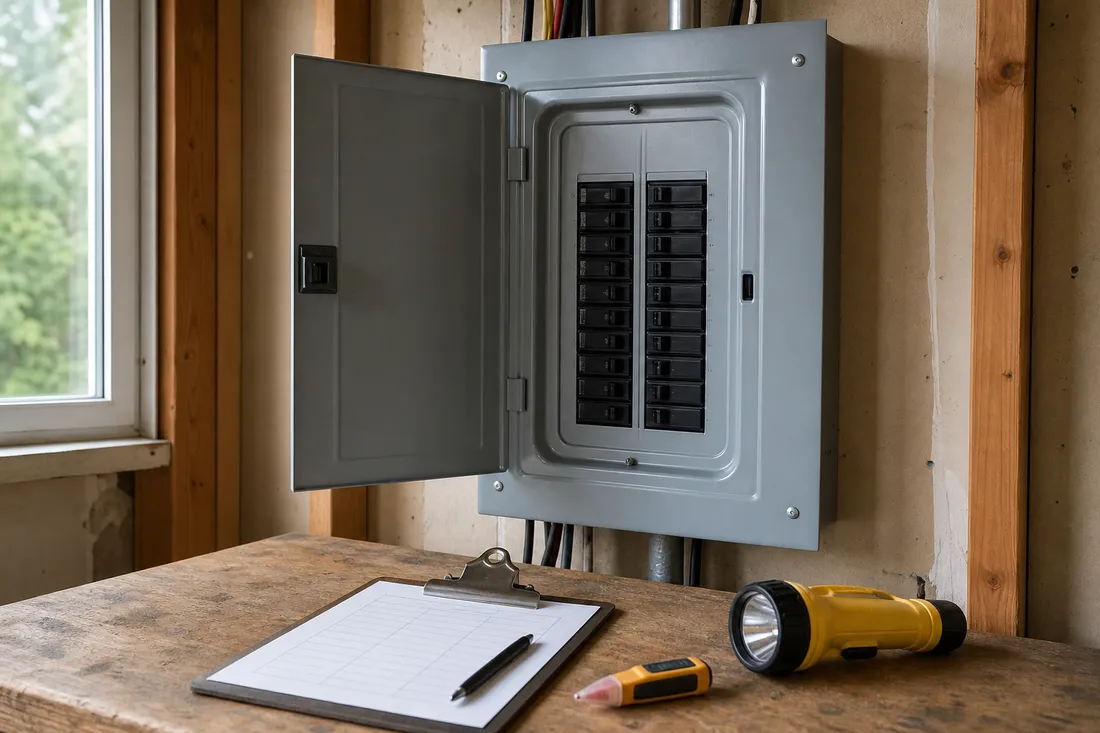
An electrical inspection checklist is a written list of every part of a wiring system you check on a visit, in a fixed order, with a place to record what you found. A workable one runs from the service entrance to the panel, the branch circuits, the devices and the protection, and it ends with ranked findings. The eight templates below cover the client interview, the service and meter, the main panel, branch wiring, a room-by-room device check, GFCI and AFCI tests, a small commercial space, and the findings report. Copy each one, replace the brackets, and cut any line outside the scope you agreed with the client.
What an electrical inspection checklist has to cover
The Electrical Safety Foundation International (ESFI) estimates that home electrical fires account for 51,000 fires each year, nearly 500 deaths, more than 1,400 injuries and $1.3 billion in property damage. An inspection is how those conditions get found before they fail, and the checklist is how you prove what you looked at.
Three different jobs share the name, and your checklist should say which one you are doing.
| Kind of inspection | Who does it | What the list is built around |
|---|---|---|
| Code inspection | The local building department | Stages of new work, each item tied to a code section |
| Home inspection | A home inspector, usually for a sale | A visual review of accessible parts |
| Safety inspection | A licensed electrician | The condition of an existing system, with repairs priced afterward |
Connecticut's state checklist for commercial work shows the first kind. It is organized by stage, from underground to rough ceilings, branch circuits, service, feeders and motors. Every row has an inspection activity, an NEC reference and a comments column. The InterNACHI home inspection standard shows the second kind. It is a visual standard. The inspector is not required to remove panelboard covers or dead fronts, or to determine compliance with codes.
The templates here are for the third kind: a paid safety inspection of an existing home or small commercial space. Each one has the same four parts.
| Part | What to write | Example line |
|---|---|---|
| Job header | Client, address, date, electrician, license number | "412 Alder St, built 1968, 100 A service" |
| Scope | What you will open, test and leave alone | "Panel cover removed. No attic entry." |
| Check lines | One verb and one object per line, in walking order | "Test every GFCI with its own button" |
| Findings | What you saw, where, and how urgent | "Scorched receptacle, north bedroom. Fix now." |
Template 1: Job header and client interview
Start with the person who lives or works with the system. ESFI lists the warning signs worth asking about: dim and flickering lights, sizzling and buzzing sounds from the electrical system, and circuit breakers that trip repeatedly. A homeowner who reports a warm switch plate has already told you where to spend your first ten minutes.
ELECTRICAL INSPECTION: [Client name]
Address: [Street, city]            Date: [Date]
Electrician: [Name]                License: [Number]
Reason for visit: [Sale / insurance / safety check / other]

Year built: [Year]                 Service size: [Amps]
Past electrical work: [What, when, by whom]
Permits on file for that work: [Yes / No / Unknown]

Ask the client:
[ ] Any breakers that trip or fuses that blow? Which?
[ ] Any lights that dim or flicker? Where?
[ ] Any buzzing, sizzling or burning smell? Where?
[ ] Any warm or discolored outlets or switch plates?
[ ] Any outlets or switches that do not work?
[ ] Any shocks or tingles from appliances or taps?
[ ] Extension cords in permanent use? Where?
[ ] New large loads planned: [EV charger / range / spa]

Scope agreed: [What will be opened and tested]
Not included: [Attic / crawl space / pool / generator]
Power may be off for: [Minutes]    Client initials: ____
Write the scope before you open anything. A client who expects a full report will be disappointed by a panel-only visit, so name the areas you are not entering and have them initial the line. If the visit follows from a quote for larger work, match the scope to the one in your electrical contract.
Template 2: Service entrance and meter
Walk the outside first. The InterNACHI standard gives a useful order for the service. It starts at the service drop and the attachment point, then the service head and drip loops. The mast and conduit, the meter and base, and the service-entrance conductors follow. You are looking at the same parts with more training and a wider scope.
SERVICE AND METER: [Address]       [Date]
Service type: [Overhead / underground]
Utility: [Name]                    Meter number: [Number]

[ ] Service drop clear of trees and structures
[ ] Attachment point solid, no pulled anchors
[ ] Drip loops present, insulation intact
[ ] Service head and mast straight and sealed at the roof
[ ] Conduit and fittings tight, no rust-through
[ ] Meter base secure to the wall, seal intact
[ ] No scorch marks, melting or corrosion at the meter
[ ] Service cable jacket intact, no fraying
[ ] Entry point into the building sealed
[ ] Grounding electrode conductor visible and connected
[ ] Ground rod or other electrode located: [Where]
[ ] Outdoor disconnect, if any, labeled and operable
[ ] Clearance issues to report to the utility: [Notes]

Photos taken: [Count]
Utility-side problems: ____________________________
Keep utility-side problems on their own line. You can describe a damaged drop or a broken meter seal, but the repair belongs to the utility, and the client needs to know who to call.
Template 3: Main panel and subpanels
The panel is the center of the visit. Record what is on the label before you judge anything, because the label is what a later reader of your report will check first.
PANEL: [Main / Sub]   Location: [Where]   [Date]
Make and model: [From label]       Rating: [Amps]
Main disconnect: [Amps]            Type: [Breaker / fuse]

Before opening:
[ ] Space in front of the panel clear, nothing stored
[ ] Light available at the panel
[ ] Enclosure secure to the wall, door operates
[ ] No rust, water stains or scorch marks outside
[ ] Circuit directory present and legible

Cover removed:
[ ] No unused openings left unfilled
[ ] No signs of overheating at breakers or bus
[ ] No corrosion, moisture or pest debris inside
[ ] Breaker size matches conductor size, each circuit
[ ] Number of conductors under each terminal noted
[ ] Neutral and ground terminations tight and noted
[ ] Bonding arrangement noted: [Describe]
[ ] Cable clamps or bushings at every entry
[ ] Wiring type observed: [Copper / aluminum / mixed]
[ ] Breakers match the panel listing: [Yes / No]
[ ] Directory checked against breakers: [Count] verified

Readings, if in scope: [Voltage, load, thermal scan]
Findings: ________________________________________
Two of those lines match the home inspection standard. InterNACHI tells inspectors to report any unused circuit-breaker panel opening that was not filled, and to describe the main disconnect's amperage rating if it is labeled. Fill both in every time, so your report and a home inspector's report agree on the basics.
Subpanels get the same sheet. Print one copy per enclosure, and write the feeder breaker and its location in the header so the next electrician can find the source.
Template 4: Branch circuits and wiring
This sheet covers what you can see between the panel and the devices: the basement ceiling, the attic, the crawl space and any open framing. Agree with the client on which of those you will enter, since each one adds time.
BRANCH WIRING: [Address]           [Date]
Areas entered: [Basement / attic / crawl / garage]

[ ] Wiring methods observed: [NM / conduit / armored / other]
[ ] Conductor material: [Copper / aluminum / both]
[ ] Cables supported, not sagging or hanging on pipes
[ ] No damaged, cut or rodent-chewed insulation
[ ] Every splice inside a covered box
[ ] Junction boxes accessible, covers in place
[ ] No open knockouts in boxes
[ ] No cords used as permanent wiring
[ ] Cables protected where they pass through framing
[ ] Insulation not packed around fixtures not rated for it
[ ] Dedicated circuits for large appliances: [List]
[ ] Outdoor and wet-area wiring in suitable enclosures
[ ] Abandoned wiring marked or removed: [Where]

Aluminum branch wiring found: [Yes / No]  Where: ______
Findings: ________________________________________
Aluminum branch wiring deserves its own line. The U.S. Consumer Product Safety Commission (CPSC) cites a national survey of homes built before 1972. Those wired with aluminum are 55 times more likely to have one or more connections at outlets reach "Fire Hazard Conditions" than homes wired with copper. The CPSC adds that homes built before 1965 are unlikely to have it, and that cables installed between 1965 and the mid 1970s may contain it. If the house falls in that window, pull a few devices and look.
When you find it, describe the repair options in the CPSC's terms. Its staff considers pigtailing with a COPALUM connector a safe and permanent repair, and its publication also lists the AlumiConn connector as an acceptable alternative.
Template 5: Receptacles, switches and fixtures by room
Go room by room with a plug-in tester and print one block per room. InterNACHI inspectors check "a representative number" of switches, fixtures and receptacles. A safety inspection can promise more, so write the count you tested.
ROOM: [Name]                       [Date]
Receptacles in room: [Count]       Tested: [Count]

[ ] Each tested receptacle has power
[ ] Polarity correct on the tester
[ ] Ground present on three-slot receptacles
[ ] Cover plates in place, none cracked
[ ] No scorch marks, melting or loose plugs
[ ] Receptacles hold a plug firmly
[ ] Switches operate, no buzzing, plates not warm
[ ] Dimmers not hot to the touch under load
[ ] Fixtures secure, no exposed conductors
[ ] Bulb wattage within the fixture's marked limit
[ ] Ceiling fan secure, no wobble at full speed
[ ] Extension cords and power strips in use: [Count]
[ ] Cords not run under rugs or through doorways

Failed devices: [Location and what the tester showed]
Notes: ___________________________________________
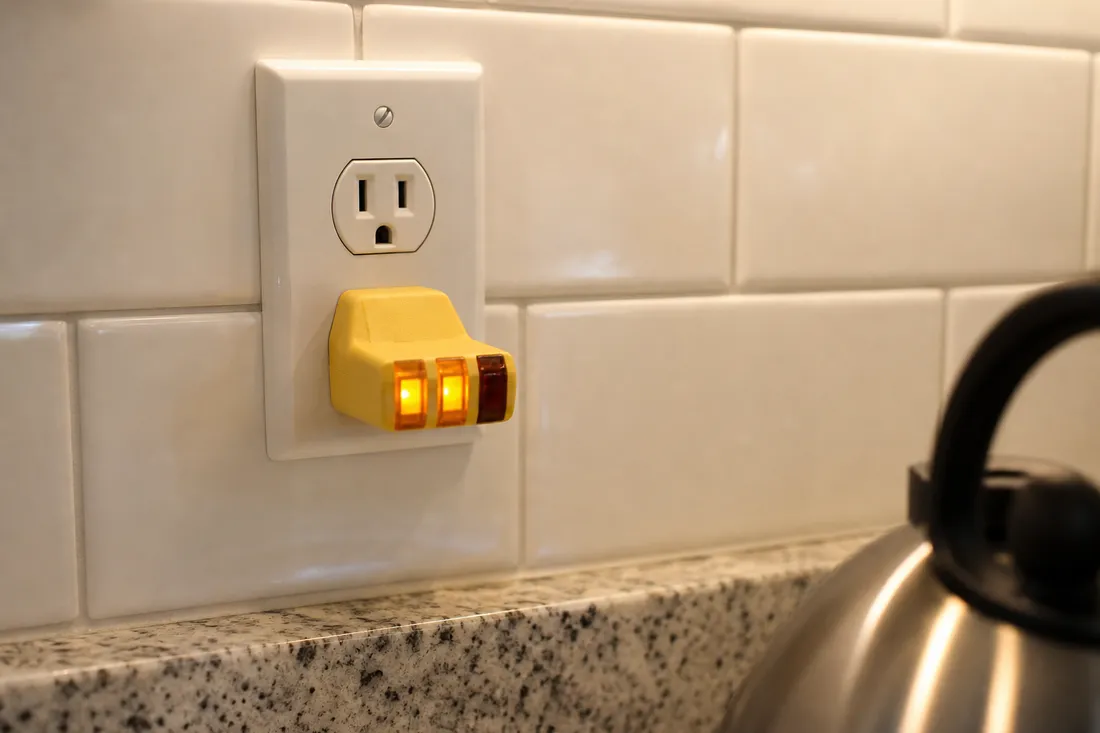
Receptacles earn the attention. ESFI reports the CPSC's figure that electrical receptacles are involved in 5,300 fires every year, causing forty deaths and more than 100 injuries. The failed-device line should match what InterNACHI reports as needing correction: no power, incorrect polarity, a missing cover, evidence of arcing or excessive heat, or a GFCI that did not operate properly.
The extension cord count is a sales note as much as a safety note. ESFI says to use extension cords only temporarily and to have a qualified electrician add circuits or outlets where they are needed. A room with four power strips is a room that needs receptacles.
Template 6: GFCI, AFCI and alarm checks
Protection devices get their own sheet, because the result is pass or fail and the client can repeat the test after you leave.
PROTECTION DEVICES: [Address]      [Date]

GFCI protection present and tested:
[ ] Bathrooms: [Count]             Pass / Fail
[ ] Kitchen: [Count]               Pass / Fail
[ ] Garage: [Count]                Pass / Fail
[ ] Outdoors: [Count]              Pass / Fail
[ ] Unfinished basement or crawl:  Pass / Fail
[ ] Laundry or utility sink:       Pass / Fail
[ ] Wet bar sink:                  Pass / Fail
[ ] GFCI breakers in panel: [Count]  Pass / Fail

AFCI protection:
[ ] AFCI breakers present: [Count]   Circuits: [List]
[ ] Each tested with its test button: Pass / Fail

Alarms:
[ ] Smoke alarm on every level
[ ] Smoke alarm inside each bedroom
[ ] Smoke alarm outside each sleeping area
[ ] Carbon monoxide alarms present: [Where]

Areas with no GFCI protection: ____________________
Devices that failed: ______________________________
The CPSC's fact sheet explains what you are testing. A GFCI interrupts power when the current flowing out differs from the current returning by as little as 0.006 amperes. The same sheet lists when the NEC began requiring GFCI protection for receptacles in each location, which tells you what to expect from a house of a given age:
- Outdoors, since 1973
- Bathrooms, since 1975
- Garages, since 1978
- Kitchens, since 1987
- Crawl spaces and unfinished basements, since 1990
- Wet bar sinks, since 1993
- Laundry and utility sinks, since 2005
The CPSC notes that the NEC typically applies only to new construction and major renovations. An older bathroom without a GFCI is therefore a recommendation on your report, written as an upgrade. Your local code office decides what is required when other work is done.
Leave the client with the testing schedule. The CPSC says to test every GFCI after installation, at least once a month, and after a power failure. ESFI says to test smoke detectors and AFCIs monthly, and to install smoke detectors on every level of the home, inside each bedroom and outside each sleeping area.
Template 7: Small commercial space
A shop, office or restaurant adds one layer: the employer's duties under OSHA's electrical standard for workplaces. The local code still governs how the wiring was installed. The OSHA rule covers how the space is kept, and a walkthrough can check it with a tape measure.
COMMERCIAL SPACE: [Business name]  [Date]
Suite: [Number]     Contact: [Name, phone]
Panels: [Count and locations]

At each panel:
[ ] Clear width in front: [Inches]
[ ] Clear depth in front: [Feet]
[ ] Headroom: [Feet]
[ ] Nothing stored in the working space
[ ] Working space lit
[ ] Each breaker and disconnect legibly marked
[ ] Unused openings closed
[ ] Doors and hinged panels open at least 90 degrees
[ ] Panel protected from damage by carts or vehicles

Around the space:
[ ] No cords used in place of fixed wiring
[ ] No damaged cords, plugs or power strips
[ ] Cover plates on every box and device
[ ] GFCI protection at sinks and outdoor outlets
[ ] Exit and emergency lights work on test
[ ] Equipment disconnects within reach and labeled
[ ] Electrical room door signed and kept clear

Items for the owner to fix: _______________________
Items for a quote: ________________________________
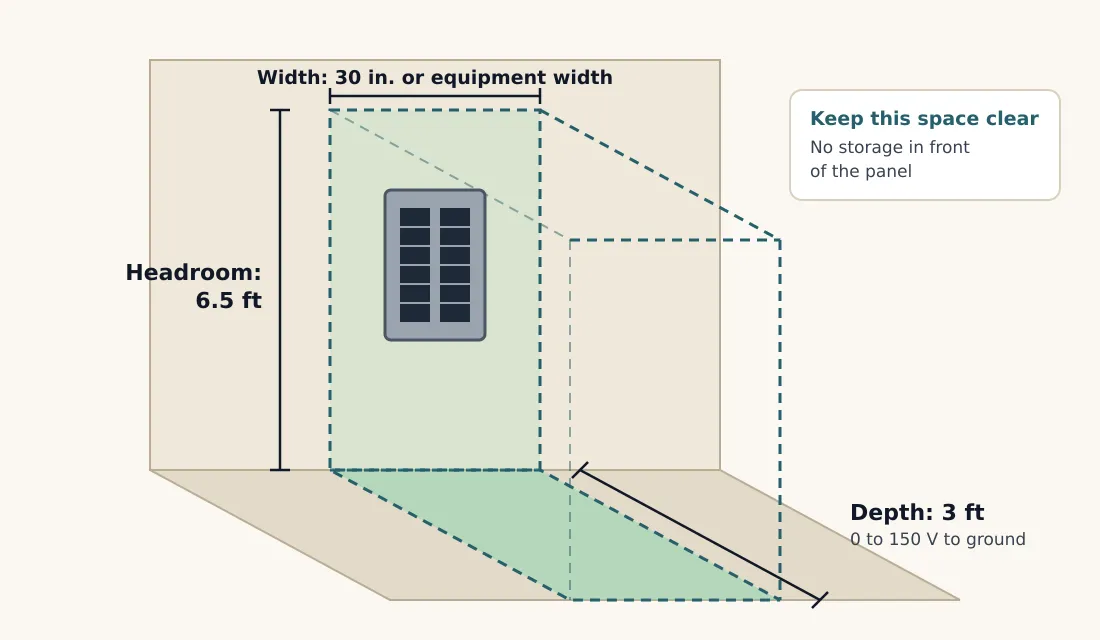
The numbers come from 29 CFR 1910.303. The working space in front of electric equipment must be the width of the equipment or 30 inches, whichever is greater. For equipment at 0 to 150 volts to ground, the minimum clear depth is 3 feet, and it rises to as much as 4 feet for 151 to 600 volts. Headroom is 6.5 feet for installations built on or after August 13, 2007. The rule also says the working space may not be used for storage and must be illuminated.
Two more lines come from the same standard. Each service, feeder and branch circuit must be legibly marked at its disconnecting means or overcurrent device to indicate its purpose, unless the purpose is evident. Unused openings in boxes, cabinets and equipment cases must be effectively closed. Boxes stacked in front of a panel and a blank directory are the findings an owner can fix the same day, so list them apart from the work you would quote.
Template 8: Findings report and sign-off
The report is what the client pays for. Rank every finding, so a homeowner reading it at the kitchen table knows what cannot wait.
FINDINGS REPORT: [Client name]     [Date]
Address: [Street, city]
Electrician: [Name]                License: [Number]
Inspected: [Service / panels / wiring / devices / protection]
Not inspected: [Areas and why]

PRIORITY 1: Fix now (shock or fire hazard)
1. [What] at [Where]. Photo: [Number]
2. [What] at [Where]. Photo: [Number]

PRIORITY 2: Fix soon (defect, not an immediate hazard)
1. [What] at [Where]. Photo: [Number]

PRIORITY 3: Upgrade to consider
1. [What] at [Where]

Made safe during the visit: [What you did, or "Nothing"]
Circuits left off: [Which, and why]

This report describes conditions seen on the date above
in the areas listed as inspected. It is not a code
compliance certificate from the building department.

Electrician signature: ____________  Date: ________
Client signature: _________________  Date: ________
Keep the report and the price on separate pages. Send the findings first, then write each priority group as its own line item in an electrical estimate, so the client can approve the urgent work without committing to the upgrades.
The disclaimer line matters when the inspection is for a sale or an insurer. Your report describes condition. Only the local authority issues a code approval, and a reader who confuses the two will hold you to the wrong standard.
Questions electricians ask about inspection checklists
What does an electrical inspection include?
It includes the service entrance, the panels, the visible branch wiring, the devices and the protection, followed by a written report. The InterNACHI standard names the same chain for a home inspector, from the service drop to the main disconnect, panelboards, grounding and bonding, receptacles and GFCIs. An electrician's version goes further by removing covers and testing more devices.
How often should a home's electrical system be inspected?
ESFI and the CPSC set no fixed interval for a professional inspection, so tie it to events. ESFI advises having a home inspected by qualified electricians, and it names older homes and upgrades to the electrical system as times to ask about AFCI protection. For the checks a homeowner can do, the CPSC recommends running its home electrical safety checklist every six months.
Is an electrician's inspection the same as a home inspection?
No. A home inspection is a non-invasive, visual examination, and the InterNACHI standard says the inspector is not required to remove panelboard covers or dead fronts, or to determine compliance with codes. An electrician's inspection opens the equipment and tests it.
How do you test a GFCI without a meter?
Use the lamp method from the CPSC. Plug a lamp into the outlet and turn it on, then press the test button, and the light should go out. Press reset, and the light should come back on. If the light stays on during the test, the GFCI is not working or was not installed correctly. If it does not come back on after reset, replace the GFCI.
Does aluminum wiring fail an inspection?
It is a finding to report, not an automatic failure. InterNACHI lists solid conductor aluminum branch-circuit wiring as a condition to report when it is readily visible. The CPSC describes the hazard as overheating at connections, and it names two repair methods, so your report can state the condition and the fix together.
Let homeowners request an inspection online
A homeowner who notices a flickering light or gets a home inspector's report tends to search in the evening, when your phone is off. Kejoola gives an electrician a four-page website with Home, Services, Blog and Contact pages and an online booking form. The form asks for a name, email, phone number and a notes box, so the homeowner can describe the panel, the age of the house and what they noticed. You read the request the next morning, call back, and bring Template 1 to the visit.
Sources
- ESFI: Home Electrical Fires
- CPSC: GFCI Fact Sheet
- CPSC: Home Electrical Safety Checklist
- CPSC: Repairing Aluminum Wiring
- OSHA: 29 CFR 1910.303, Electrical, General
- InterNACHI: Home Inspection Standards of Practice
- Connecticut Department of Administrative Services: Commercial Electrical Inspection Checklists